
So you need to resize your nice big product photos for the Cherrywood Art Fair application, huh? Well it’s not as difficult as it sounds. You can use many different programs on either Mac or Windows computers, and it will just take a few minutes.
This example uses Photoshop, but the basic principal is the same in other programs. There will usually be a “Resize Image” option, and you’ll just need to change the pixel dimensions and save your new image.
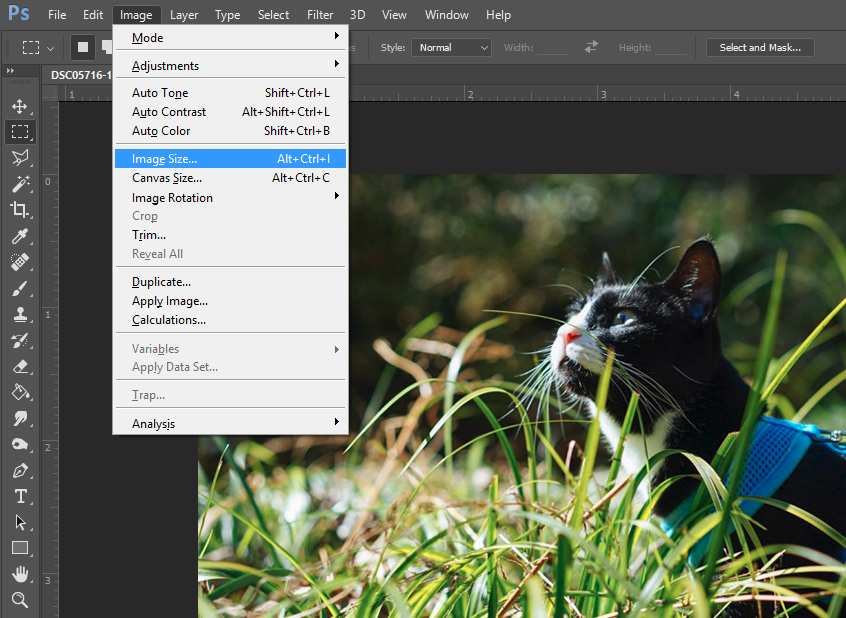
First, open your file and look for the “Image Size” or similar option in your program of choice. In Photoshop it’s under the appropriately named “Image” menu.
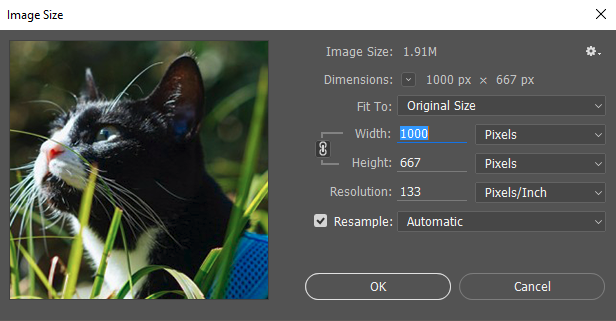
Next, find the field that is labeled “Pixels” and change the number of the LONGEST EDGE to 1080. Your photo doesn’t have to be square, we just want the longest side of the photo to be no larger than 1080px. The smaller edge will adjust automagically depending on your photo’s proportions. The “Resolution” field is less important, but try to keep this number at 133 pixels/inch (or PPI).
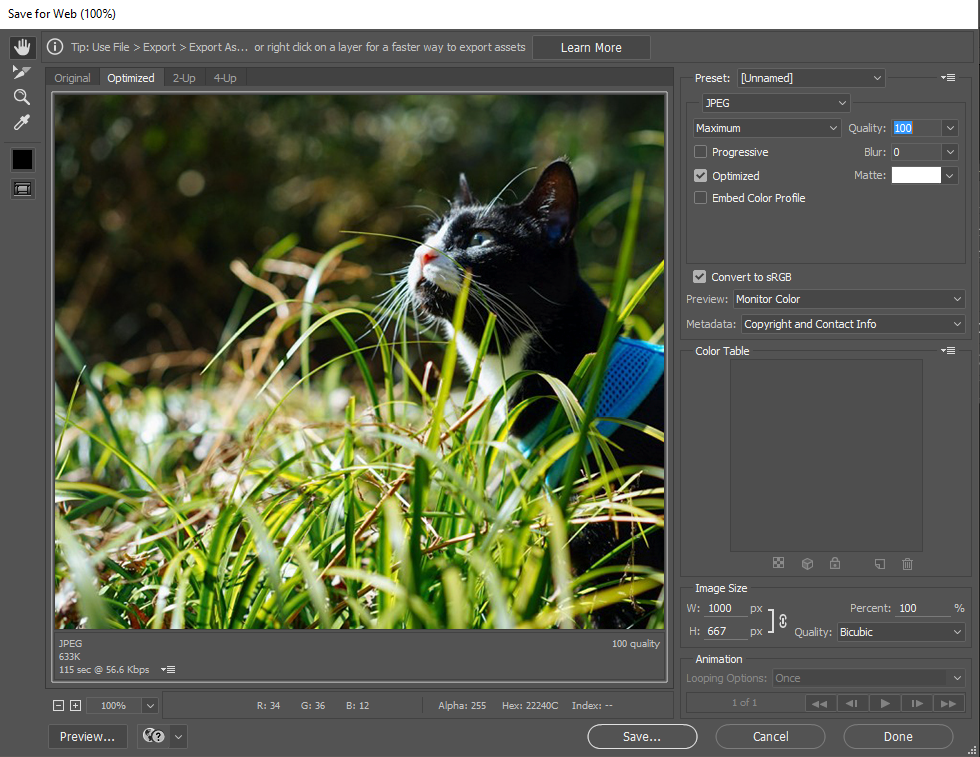
After you’ve resized your photo, you just need to save it. In Photoshop, you can find the “Save for Web…” menu inside the main “File” menu. In other programs you will look for “Save as…” or “Export”. A JPEG file saved at MAXIMUM QUALITY is best and will net you the smallest file size at the highest quality. You can also save the photo as a PNG or GIF, but your final file size will be much larger. Try to keep your photo under 1MB if you can.
*For more in depth tutorials, just search Google for “resizing photo in (YOUR PROGRAM OF CHOICE)”.